Manufacturing workers frequently take measurements such as diameter, depth, width, length, and height using precision instruments like micrometers, calipers, and a vernier height gauge to obtain accurate dimensional readings.
As their name suggests, height gauges are precision measuring instruments used to verify the height of a machined workpiece for quality control purposes. These are relatively straightforward instruments in which a slider with a measuring jaw moves along a vertical beam and takes measurements perpendicular to a reference plane on the instrument’s base.
Typically, a height gauge is used on a surface plate to either measure or scribe specific features from a datum plane. Those working in an inspection or layout department will frequently use a height gauge, which is indispensable in those areas.
Since there are four basic types of height gauges, vernier, dial, digital, and electronic, we’ll start by looking briefly at each.
Vernier Height Gauge
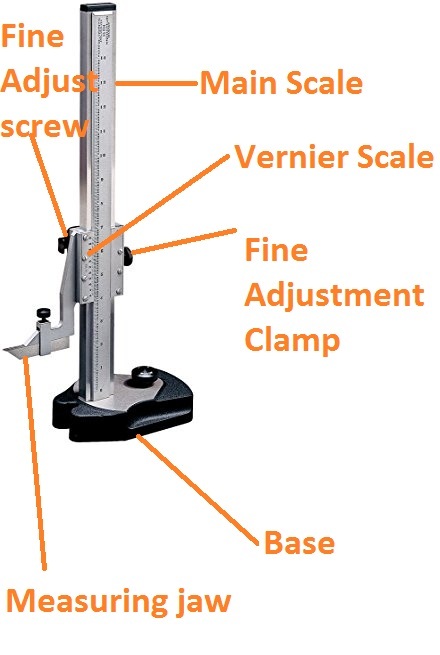
Source: https://www.mechanicalmeasuring.com
The vernier height gauge uses the main vertical scale and the smaller vernier scale to get a height reading. These gauges typically range from six inches to six feet and measure in inches or metrics.
Dial Height Gauge
Similar to the vernier style height gauges, a mechanical dial with a needle pointer replaces the vernier scale for easier reading. Dial height gauges are usually available only in smaller measuring ranges.
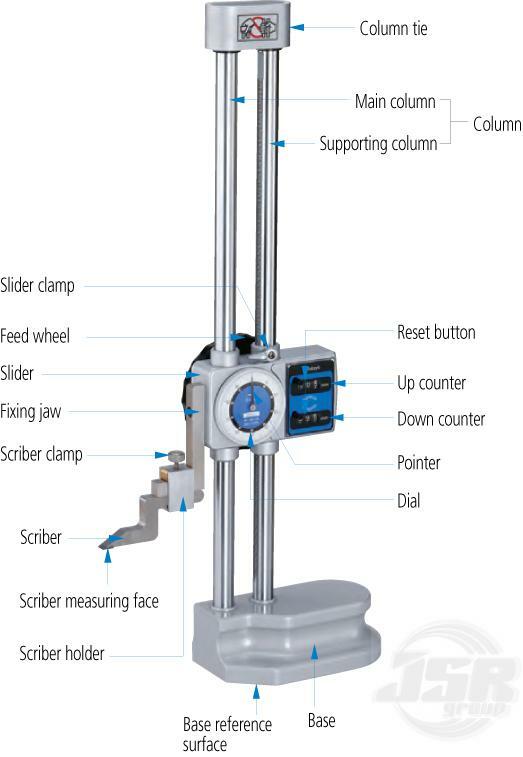
Digital Counter Height Gauges
Digital counter height gauges provide measurements on a dial display with a digital counter. The counter allows readings to tenths of an inch while the dial measures to the thousandths of an inch.
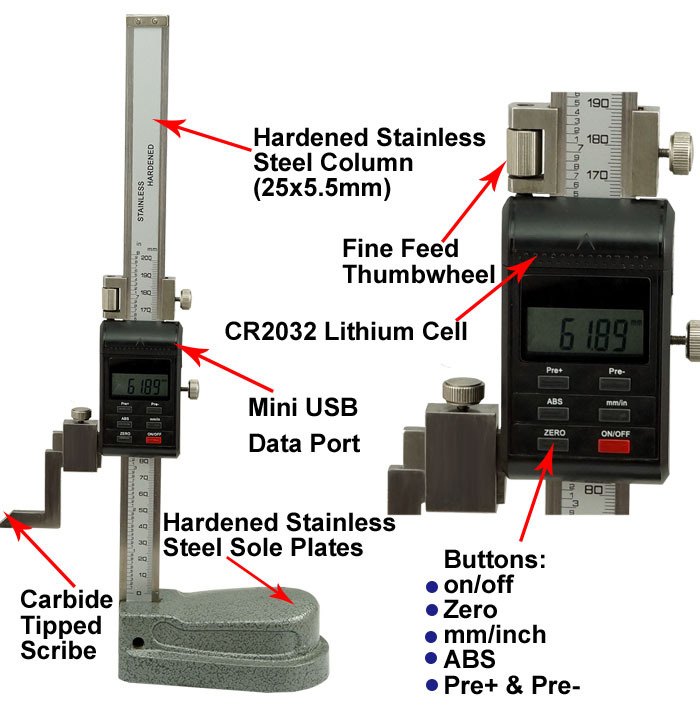
Electronic Height Gauges
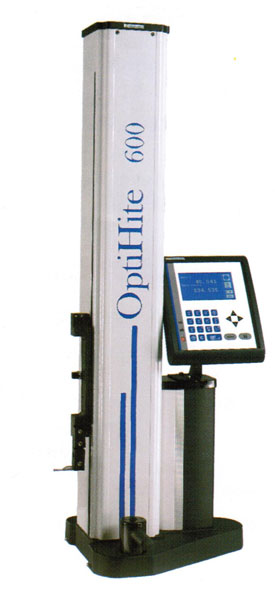
Source: https://www.worldoftest.com
Electronic height gauges offer digital displays instead of analog dials and mechanical counters. The electronic version lets the user choose the units of measure, such as inches or millimeters.
Each Height Gauge Parts Name Explained
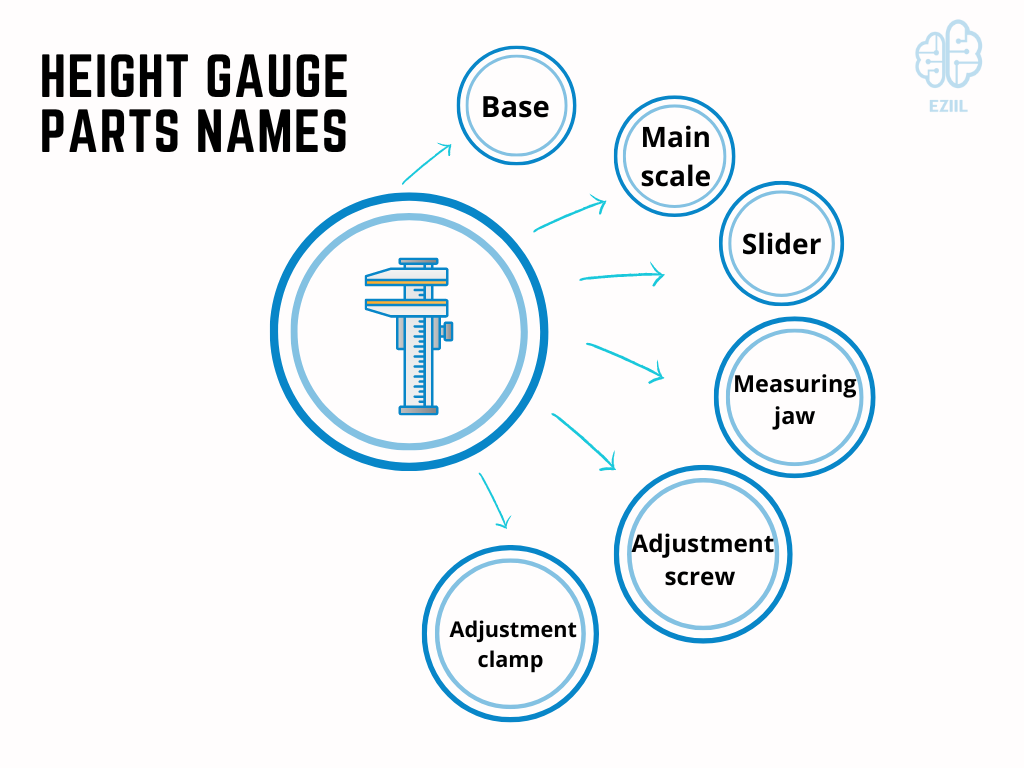
- Base: Starting at the bottom, each HG sets on a finely ground and polished rectangular-shaped base. The main vertical scale, or beam, is fastened to the base.
- Main scale: Sometimes called the beam, the main scale is mounted on and perpendicular to the base. Depending on the type of HG, it might be engraved for measuring.
- Vernier scale (slider): Only on the vernier HG in the scale is engraved and slides up or down on the main scale.
- Measuring jaw: The measuring jaw holds the scriber when needed and moves with the slider.
- Fine adjustment screw: As the name suggests, turning the fine adjustment screw allows for minute movements of the slider.
- Fine adjustment clamp: The clamp holds the slider in place to prevent false readings.

Avoiding Height Gauge Errors
As we mentioned, some HG have long vertical beams to measure up to a few feet. Although the height is not a problem, if the gauge is not designed with a larger base, you will pick up errors in your readings. Some manufacturers use bases meant for a 12″ height gauge and merely attach a 36″ beam to them.
When the relationship of a high beam to a base is incorrect, the gauge can flex and wobble, influencing the measurement. And the longer the beam, the more error you could have in your readings, causing quality issues.
One method to mitigate the performance issue is strengthening the column to decrease the flex, but this only offers a partial solution. Any downward pressure on the measuring jaw, however slight and especially at the upper positions, can cause the gauge to tip slightly and skew the reading unless the base is broader and more extended. There will only be a significant improvement in the gauge’s functioning when the ratio of the vertical beam to the base is decreased.
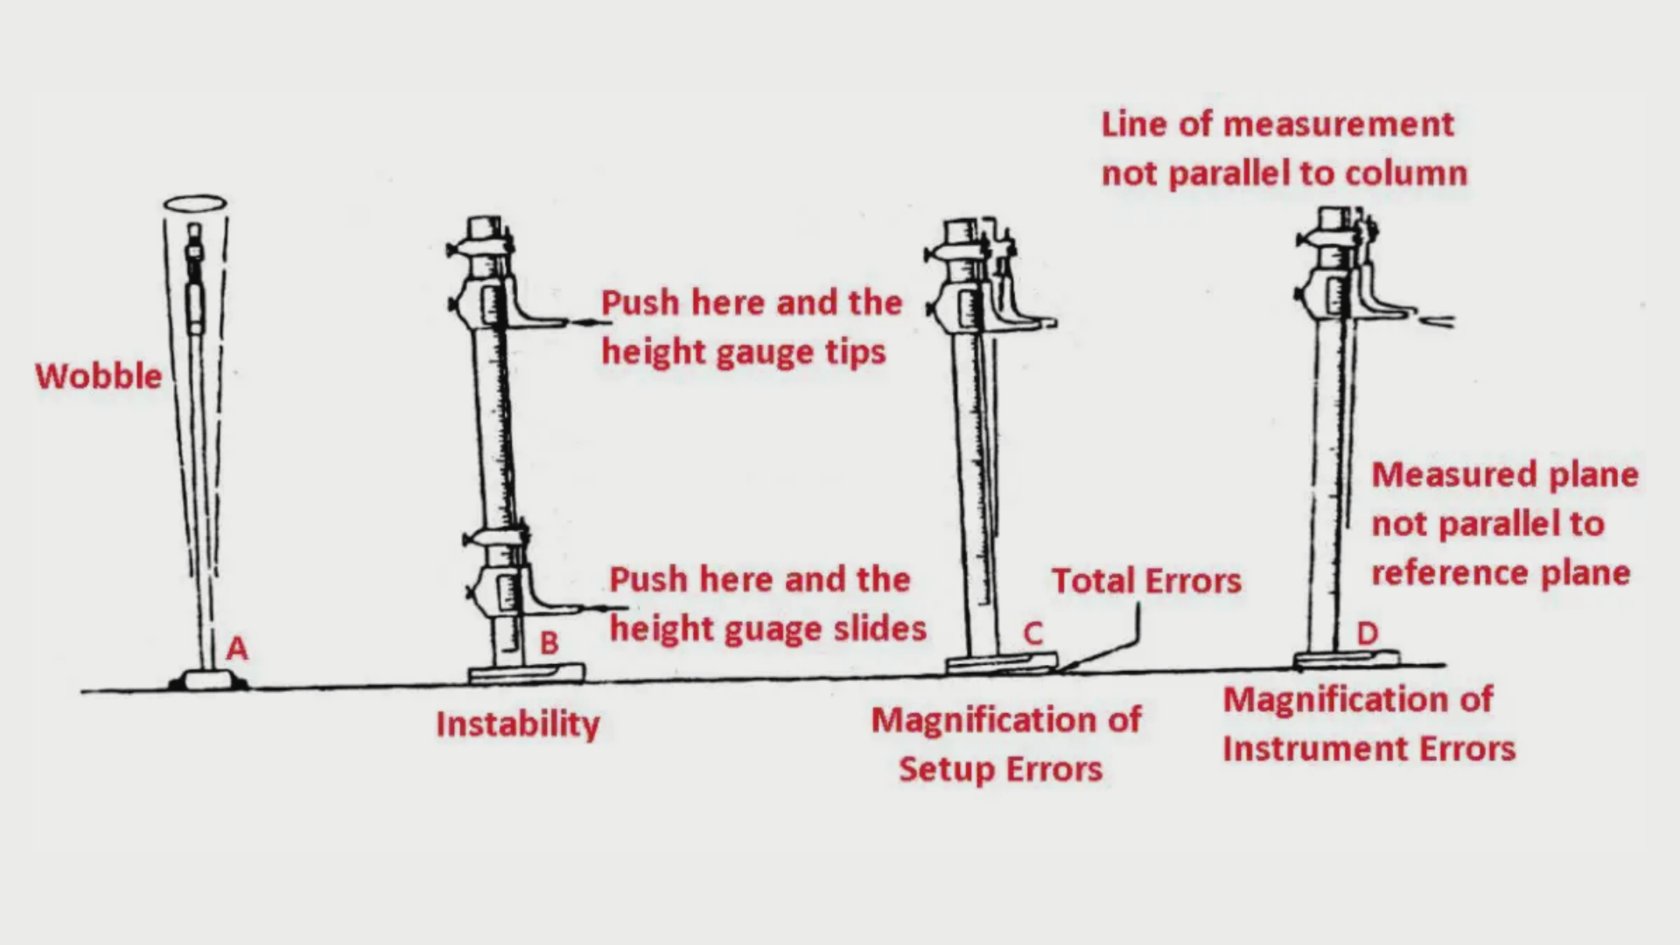
Image credit: https://www.theengineerspost.com
Even when the problems with the gauge’s base-to-beam relationship are resolved, most height gauges work on a surface plate providing the reference for the workpiece and the gauge. Although most surface plates are kept clean and maintained, some are located on or near the shop floor, making it challenging to keep them clean. An imperceivable amount of dust or a small metal chip could distort a measurement by as much as 0.020″ at the height of only ten inches.
Also, the plate’s surface can affect the height gauge’s performance. Seemingly slight imperfections will be magnified on higher measurements, so the relationship of the surface to the HG must be maintained, as well as the ratio of the base to the vertical beam.
The Role of Sliding Scale in Improving Precision with Vernier Height Gauges
A sliding scale is a key component of a vernier height gauge, which is a precision measuring tool used in manufacturing, machining, and engineering applications. The sliding scale is a secondary scale that is used to improve the accuracy of measurements taken with the gauge.
The primary scale on a vernier HG is the main vertical bar that is used to measure the height of a surface or object. This bar is typically calibrated in millimeters or inches, and it provides a general idea of the height of the object being measured. However, because the graduations on the primary scale are relatively far apart, they may not provide a precise enough measurement for some applications.
To improve the precision of measurements, the sliding scale is used. This scale is a smaller bar that slides along the primary scale and is divided into smaller graduations. These graduations are typically spaced closer together than those on the primary scale, which allows for more precise measurements to be taken.
When taking a measurement with a vernier height gauge, the sliding scale is first positioned so that the zero point on the sliding scale lines up with the zero point on the primary scale. The gauge is then positioned so that the measuring faces, located at the bottom of the gauge, are in contact with the surface being measured. The sliding scale is then moved until one of its graduations lines up exactly with one of the graduations on the primary scale. The measurement is then read by determining which graduation on the sliding scale lines up exactly with a graduation on the primary scale.
The use of a sliding scale in a vernier height gauge allows for highly precise measurements to be taken with a high degree of accuracy. This is particularly useful in applications where precise measurements are required, such as in the manufacturing of high-precision parts for machinery or other applications where tight tolerances are required.
In conclusion, Precautions When Using a
Vernier Height Gauge
- Match the height gauge to your requirements by ensuring that the gauge’s specifications are correct for your application.
- Check the slider for smooth movement without free play, and report any non-conformances to your supervisor.
- Stabilize the height gauge and datum surface by thoroughly cleaning the surface plate before placing the HG on it.

- Never use excessive force on the sliding and locking mechanisms. If you accidentally bang or drop the height gauge, have it repaired or recalibrated before using it again.
- Check the scriber for damage before using it with the height gauge.
- Thoroughly clean the height gauge with a lint-free cloth, especially the base and scriber.
- Adjust the zero line to the datum surface each time before you use the gauge.
- Avoid parallax errors by reading the scales directly from the front instead of off to the side.
- Do not store the height gauge in a high-humidity area.
- When storing the height gauge or when it needs oiling, use a lint-free cloth with a rust preventative oil and wipe each section, ensuring that the oil is spread evenly over the surfaces.
- Do not use a height gauge that has not been calibrated.
Height gauges are relatively simple and inexpensive measuring devices that mark layout lines with a scriber attachment. They allow you to check the height of a part from a surface plate or the distance between two surfaces on the same part.
The accuracy of a height gauge depends on an operator’s ability to follow the rules for its proper use. Because of that, training in its correct use will ensure those accurate measurements.